Lift Safety
To travel uphill at Ski Areas, visitors use a variety of ski lifts. Users should be familiar with the use of lifts for their own safety and the safety of others.
Loading lifts with skis or a snowboard in the winter is much different than loading your mountain bike in the summer. See below for information on using ski area lifts in the winter and summer.
Important!
Alpine Responsibility Code #9 states “Do not use lifts or terrain when impaired by alcohol or drugs.”
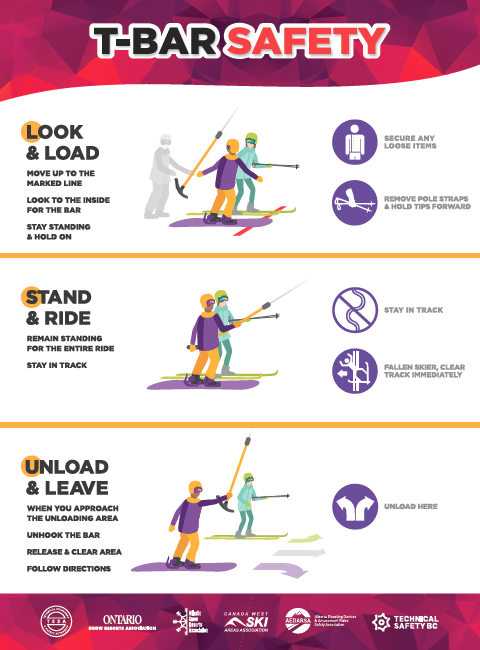
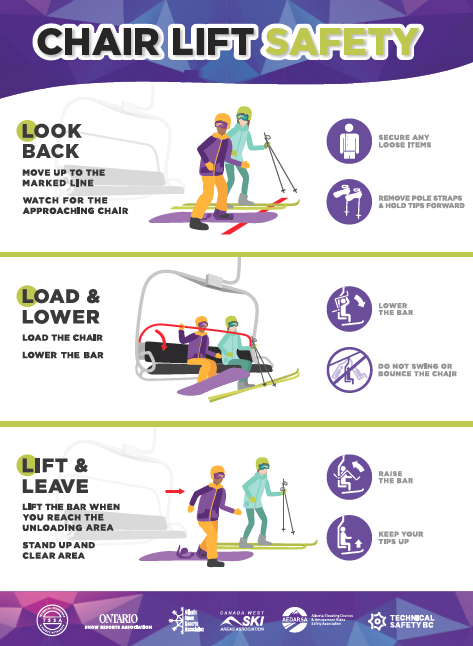
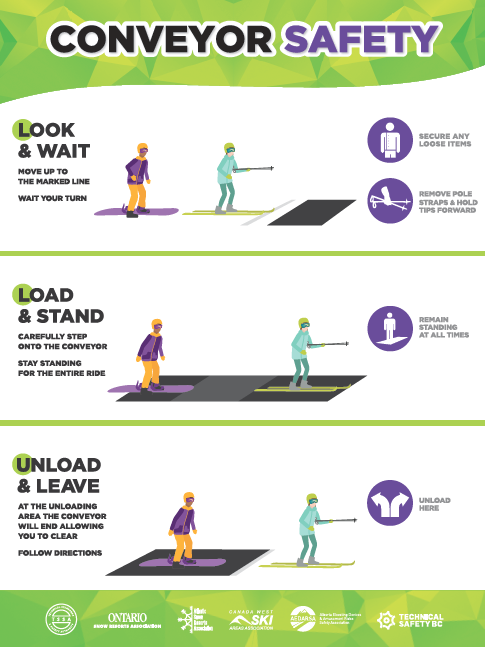
Tips for riding ski lifts
There are many signs on and around ski lifts. Each is important in its own right, informing you about the process for loading, riding, and unloading the chair. Pay attention to and obey these signs when riding a ski lift.
If you are unfamiliar with a lift or have questions, please ask a lift attendant for assistance and directions. Ski, snowboard and bike park lessons are also great ways to learn about using the ski lifts.
View Lift Safety Posters
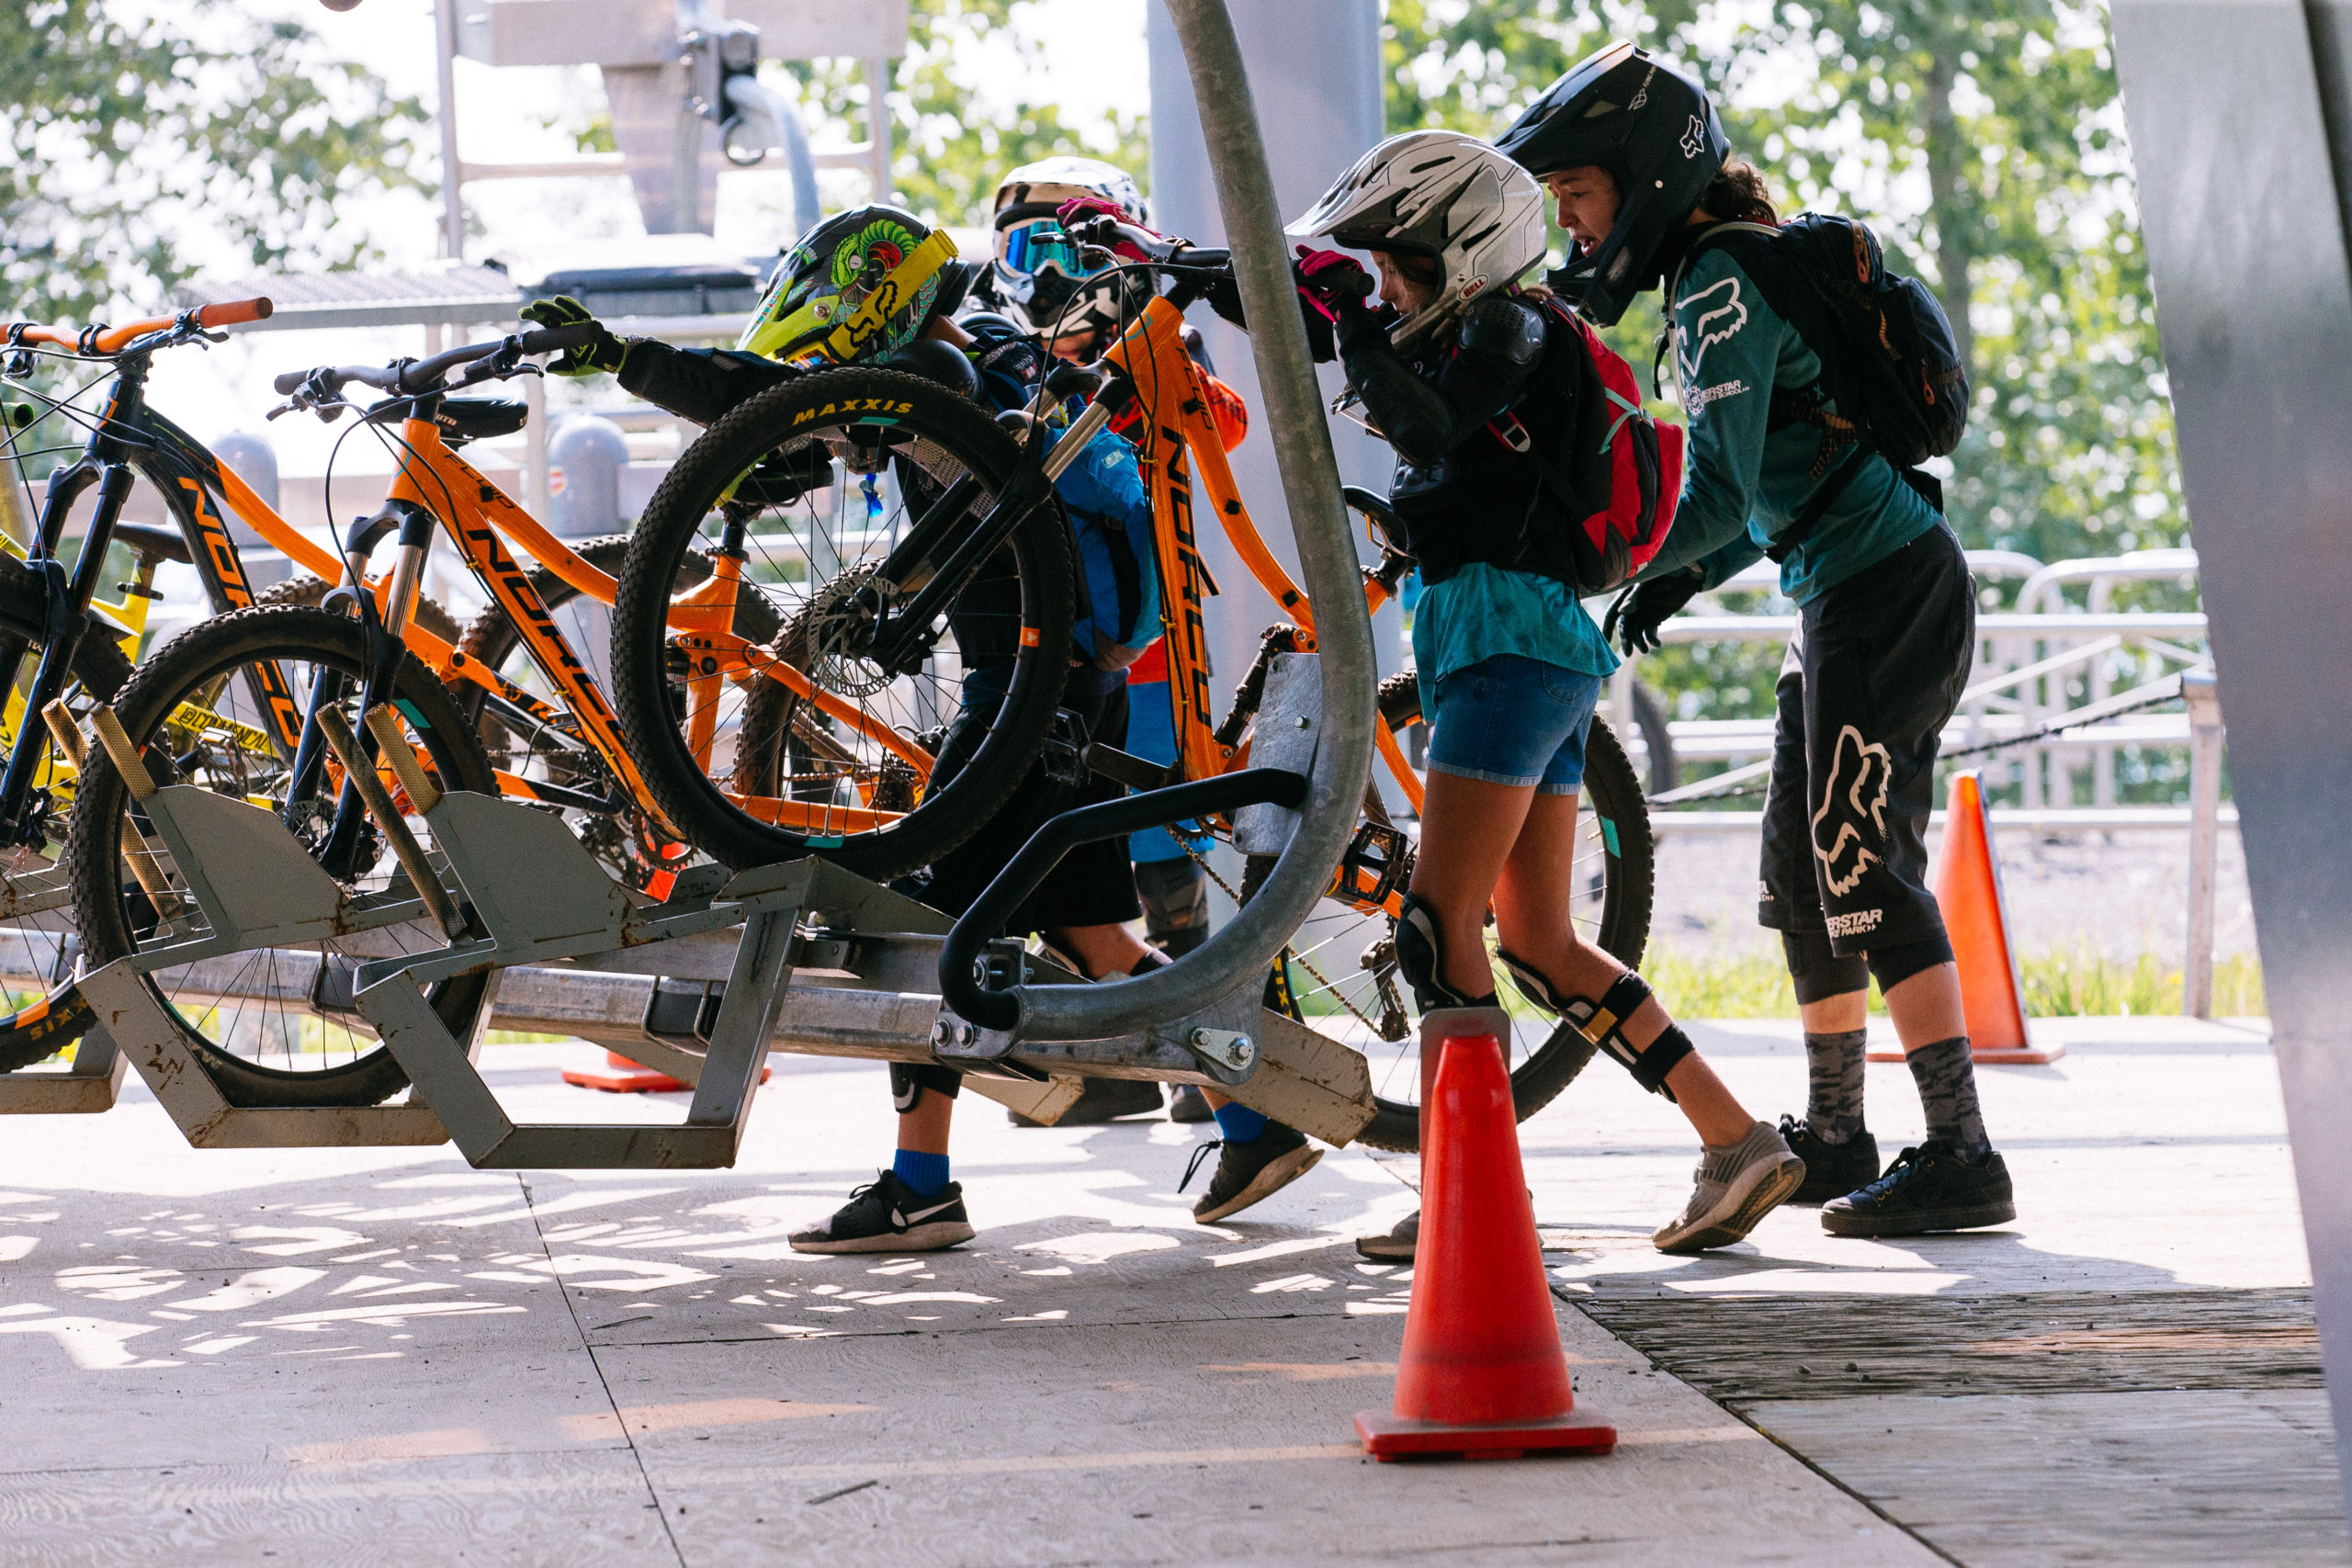
At most ski areas the bike rider will load their own bike onto the lift.
Please ask lift attendants for assistance loading bikes if you are unfamiliar, first timer or just need some help.
There are a few different loading and carrying systems at ski areas with Bike Parks.
Chair Lifts
There are a few types of chair lift bike carrying systems. Chair lifts may have a tray that carries your bike on both wheels or a vertical carrying system that hangs your bike from the front tire or a hook that may hang your bike from the back tire.
1. Prepare to Load
When loading bikes, please make yourself familiar with the type of carrier or loading system at the specific resort.
- Walk your bike through the lift line towards the loading platform.
- Roll your bike up to the bike load line indicated on the loading platform.
- You will load your bike on the chair in front of you.
Tray Style
This system has a tray that you roll/lift your bike onto horizontally.
- Follow bike carrier around. Line up your bike up with tray.
- Lift front tire onto the tray. Then push/roll your bike with one hand on the handlebar and the other on the seat into wheel well, until it is secure.
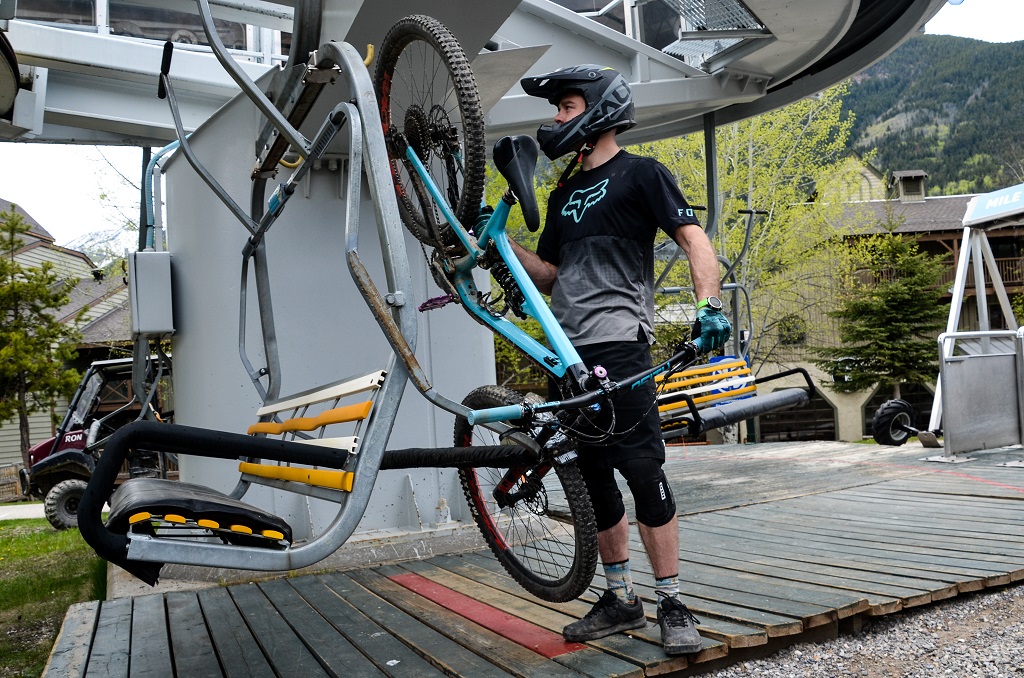
FRONT TIRE Hanging
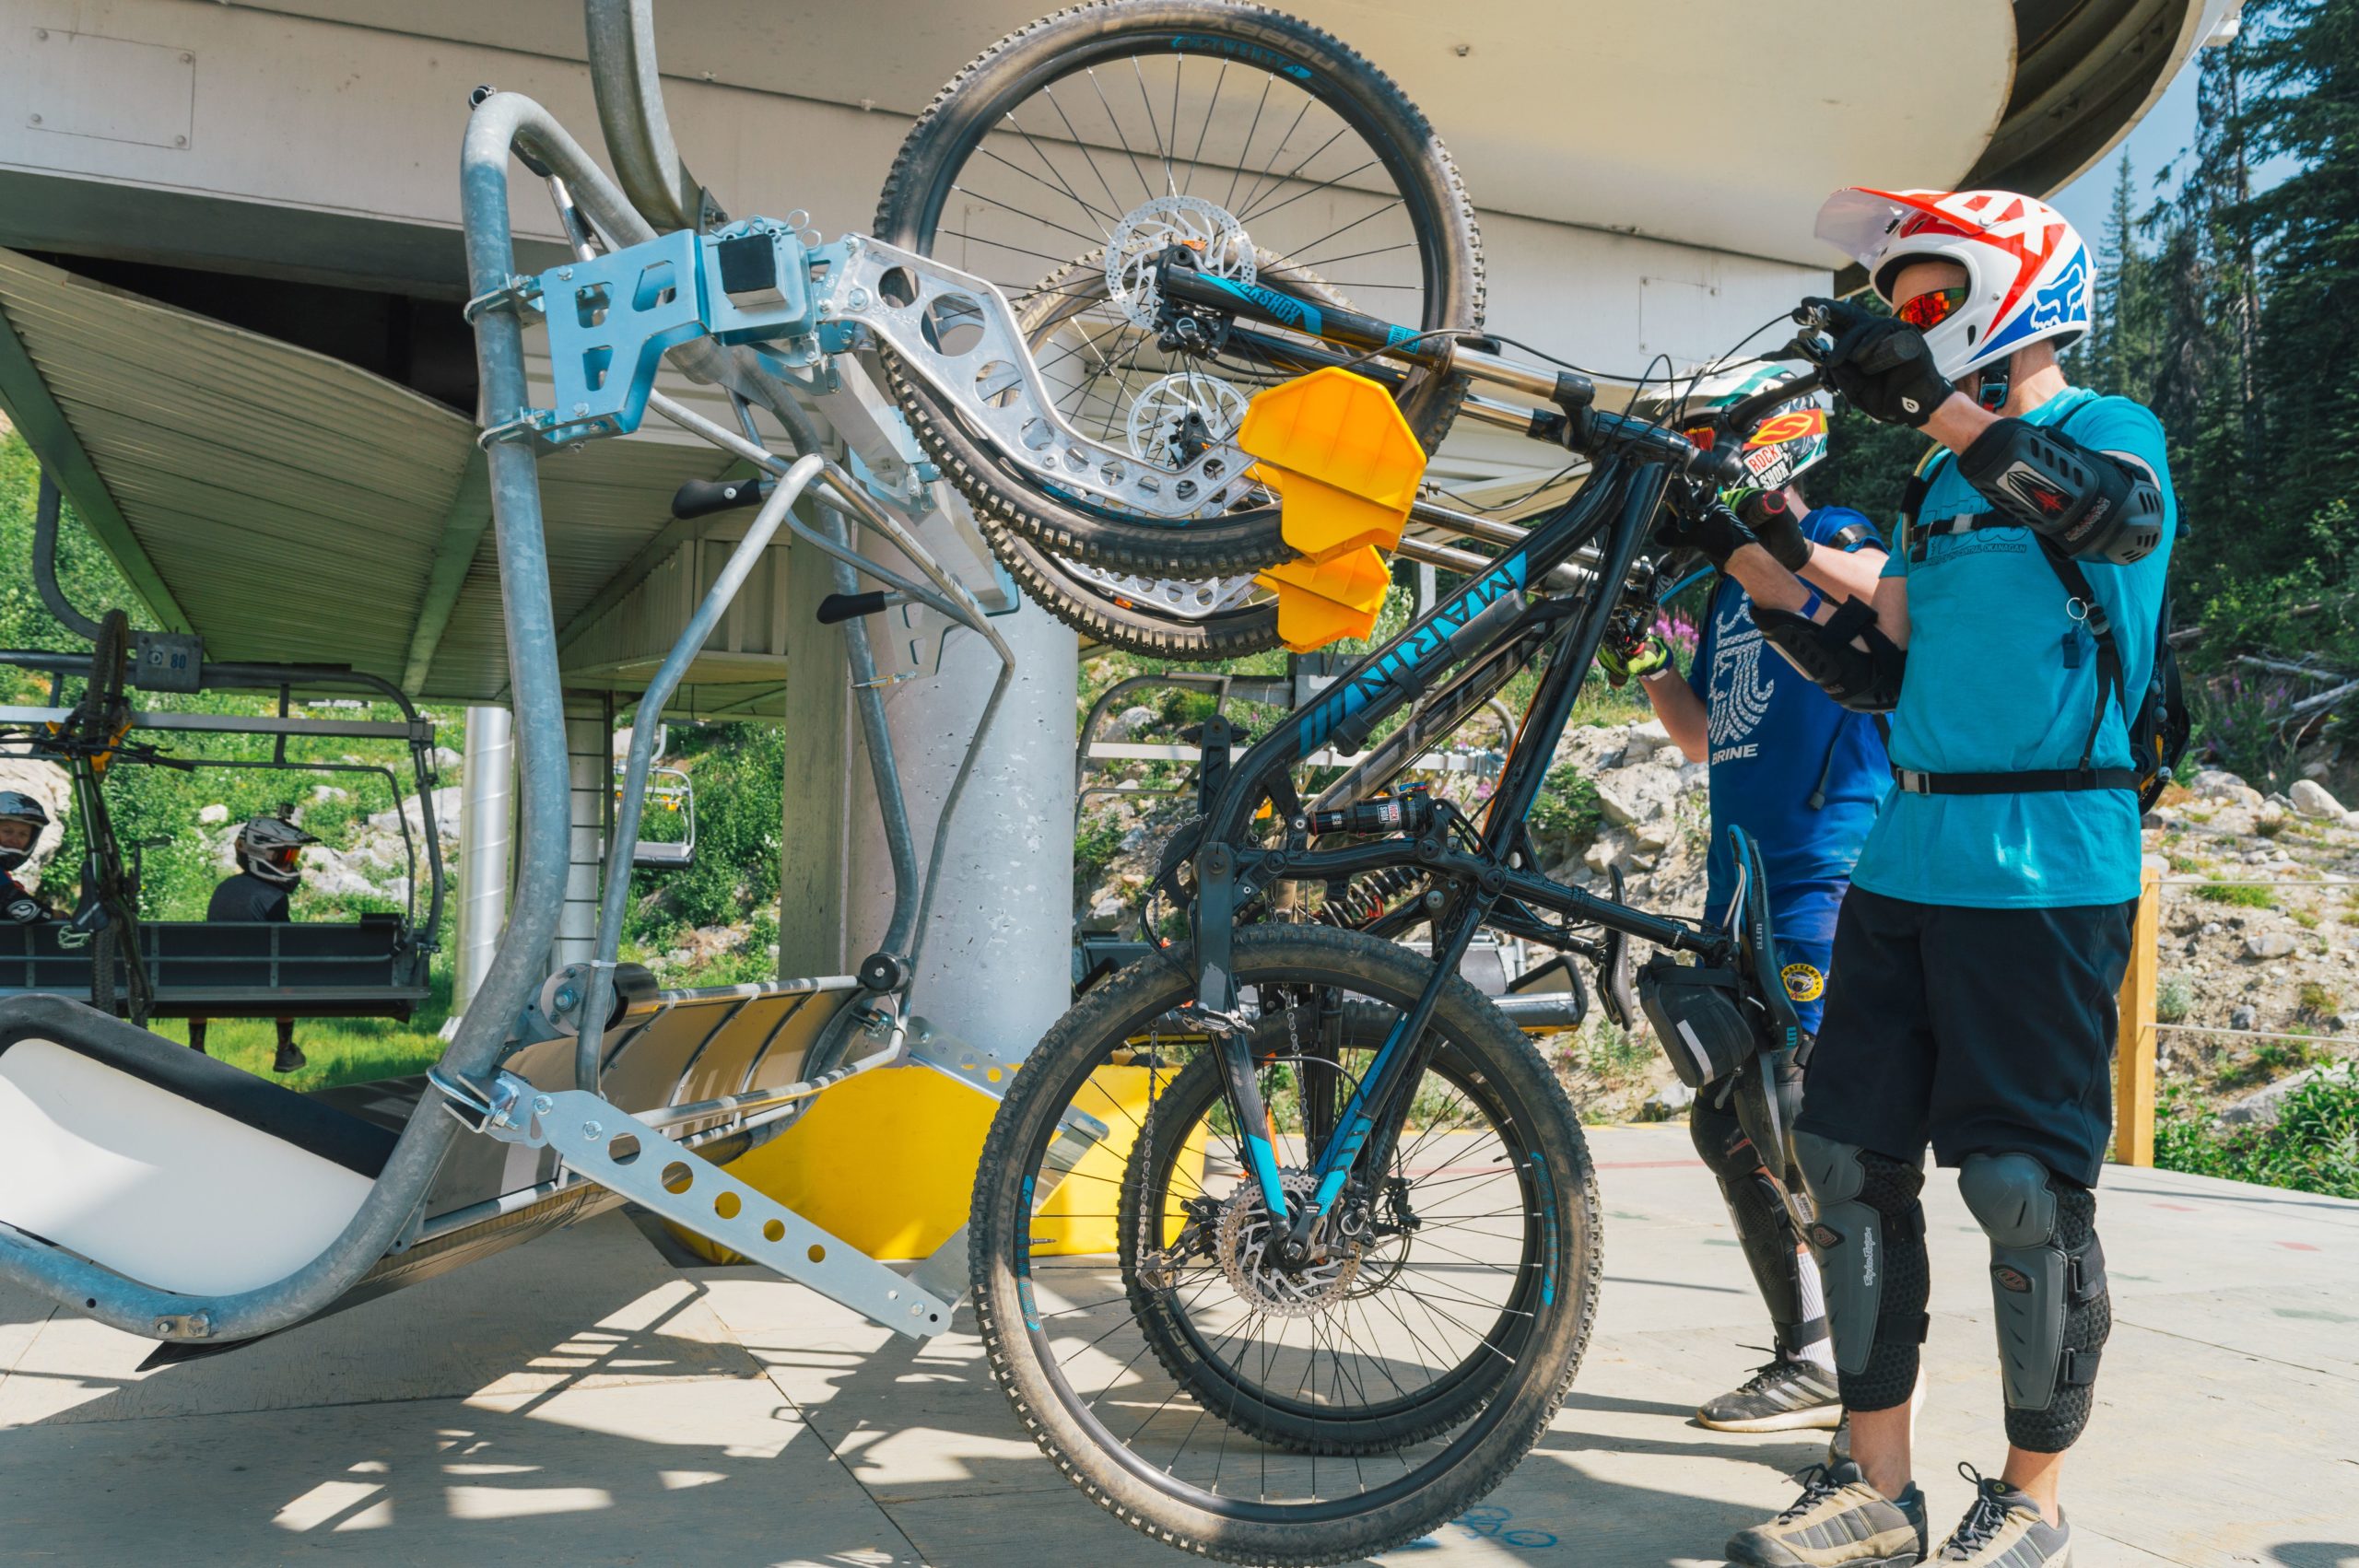
This system has a tray on the back of a chair that cradles the front tire of your bike, and hangs vertically from the front tire.
- Pull up on the handlebars to get your bike upright on the rear tire. Then stand centered behind your bike as you wait for the chair to approach.
- Wait for the chair to pass and then walk toward the back of the chair as it moves forward. Line up your front tire in the air with the carrier or hook, then give it a little push to roll the tire up onto the carrier.
Rear Tire Hanging
This system has a hook that hangs your bike, in this case from the back tire.
- Wait for the chair to pass.
- Grab the bike with the left hand on the top tube, and right hand on the chain stay.
- Lift the bike and follow the chair.
- Align the rear wheel with the hook. The handle bars should be to the left.
- Gently hang the bike from the rear wheel.
3. Load yourself onto the lift
Once you’ve loaded your bike, walk to the rider loading area (if different than the bike loading line) and sit down on the chair that follows your bike. Lower the restraining device and enjoy the ride!
4. Unload
At the top, the lift attendants will unload your bike. Please wait to the unload line before getting off the chair and the quick walk away from the path of the chair and collect your bike.
Gondola
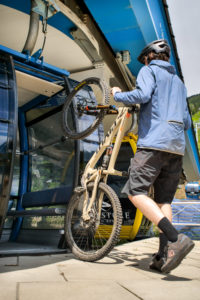 In most gondola’s that allow bikes, the bikes are carried inside the gondola and you will ride inside the cabin with your bike!
Instructions to load bike into gondola:
- Pull up on the handlebars to get your bike upright on the rear tire. Then stand centered behind your bike as you wait for the gondola to approach with open doors.
- Roll your bike into the cabin and enter with your bike.
- Once in the cabin, you can turn your bike to rest the front tire on the opposite side of the cabin.
To exit, ensure your bike is up on the rear tire and walk forward rolling onto the platform.
Note, some gondola’s will have systems similar to chair lifts, where your bike rides on a separate carrier just for bikes, and you ride in the gondola. See applicable bike load instructions in the chair lifts section above.
Important!
Mountain Bike Responsibility Code #7 states "BE LIFT SMART."
"Make sure you have the physical dexterity, ability and knowledge to safely load, ride and unload lifts when riding at lift access resorts. Ask for assistance with chairlifts and surface lifts if unsure."